
Today we are going to walk through a simple installation, run a local test, and then provision a Docker container. This should be very easy and straightforward.
Prerequisites
- Install Visual studio code
https://code.visualstudio.com/download
2. Install Homebrew
/bin/bash -c "$(curl -fsSL https://raw.githubusercontent.com/Homebrew/install/HEAD/install.sh)"More info on HomeBrew here:
Step 1 Install Terraform
We will use Homebrew for the installation. Open your terminal on your MAC and run the to install terraform.
brew tap hashicorp/tap
brew install hashicorp/tap/terraform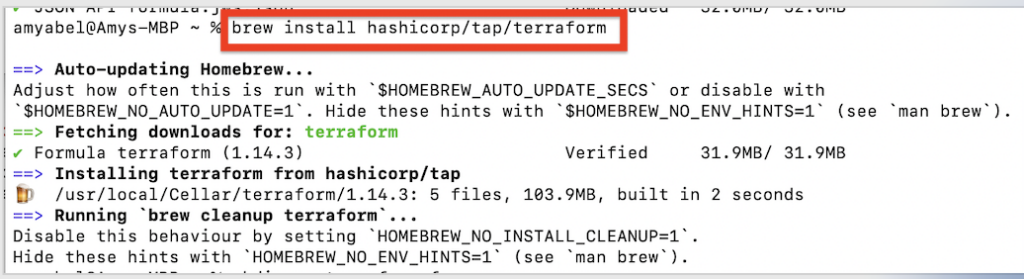
You can get more information here:
https://developer.hashicorp.com/terraform/install
Step 2 Create a Directory for Terraform
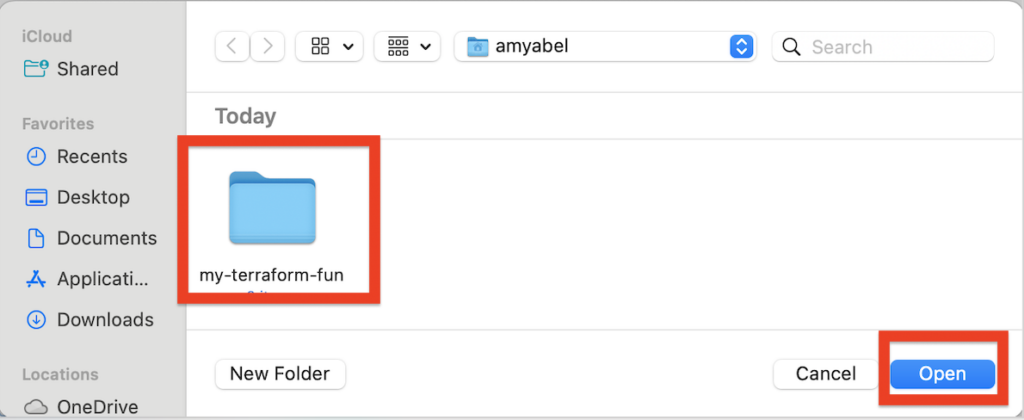
Create a directory for our project called my-terraform-fun.
mkdir my-terraform-fun
cd my-terraform-fun
Step 3 IDE Setup
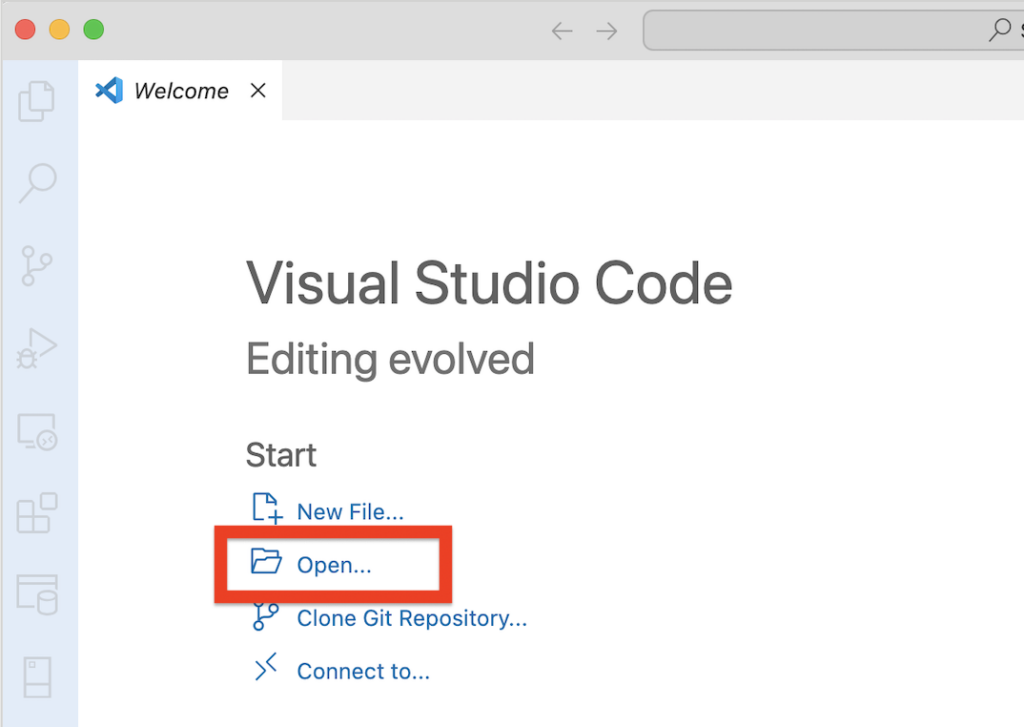
Now that you have your folder, open it in your preferred IDE. I bounce between tools often, moving from IntelliJ to Visual Studio or from Mac to Windows, but for this, I’m using Visual Studio Code.
- Open the Folder for the Terraform you created
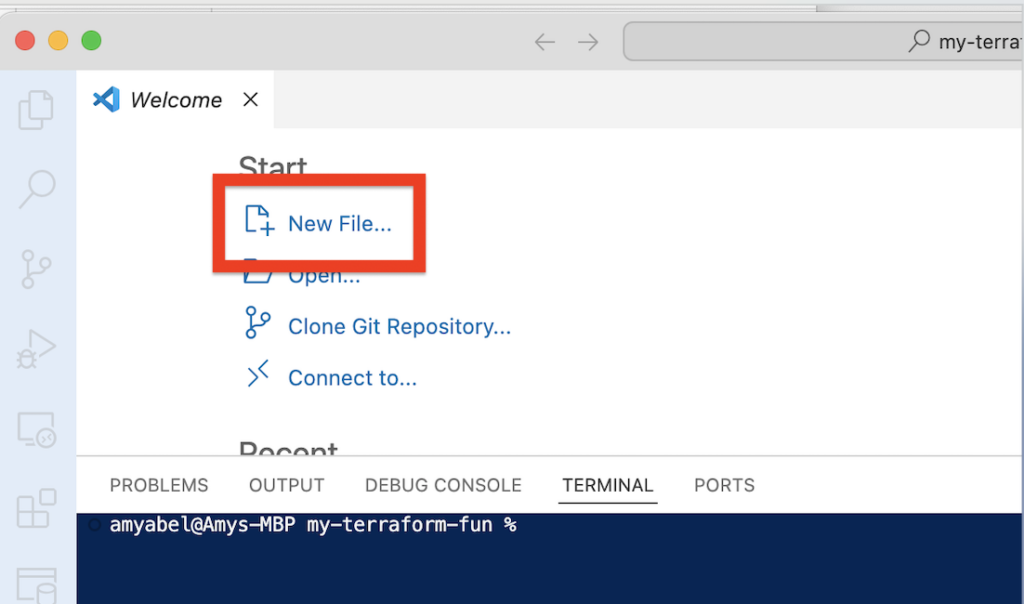
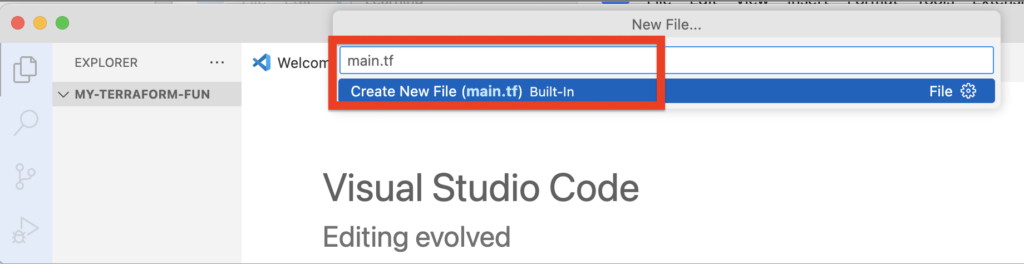
Step 4 Create the main.tf File in Visual Studio
Create a file named main.tf
It NEEDS to be named main.tf
Step 5 Create a local file with Terraform
We are going to generate a text file on your local machine. This will let us know if Terraform is installed and working correctly.
- Paste in the code in your main.tf file
terraform {
required_version = ">= 1.14.3"
}
# Put the provider you are using here
provider "local" {}
# Add a file you are creating here
resource "local_file" "stuff" {
  filename = "stuff.txt"
  content  = "Wow, mom look what I did!"
}
2. Do a CTRL+S and SAVE THIS!!
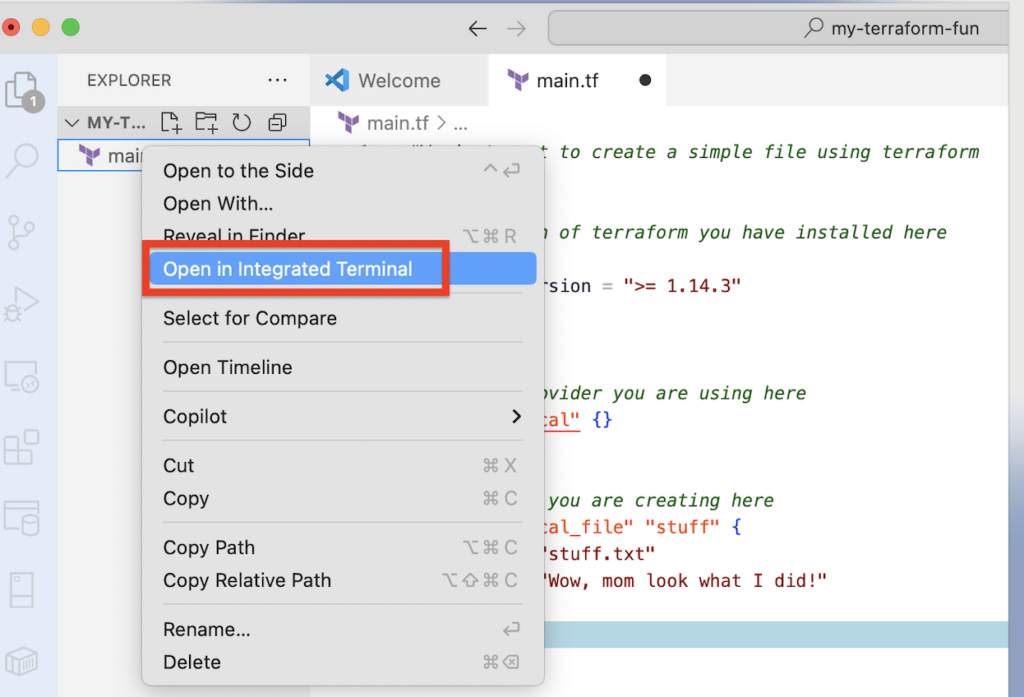
3. Now, open the terminal inside your IDE. Right Click on file click “Open in Integrated Terminal”
4. Copy and paste each line of code to run in the terminal – We are only going to run a few commands today
- Terraform init – Initializes the project
- Terraform plan – just a dry run of what you are expecting to happen
- Terraform validate – checks for errors
- Terraform apply – Makes the changes
- Terraform destroy – removes all the resources and definitions
5. Run the Initialize Terraform Command
terraform init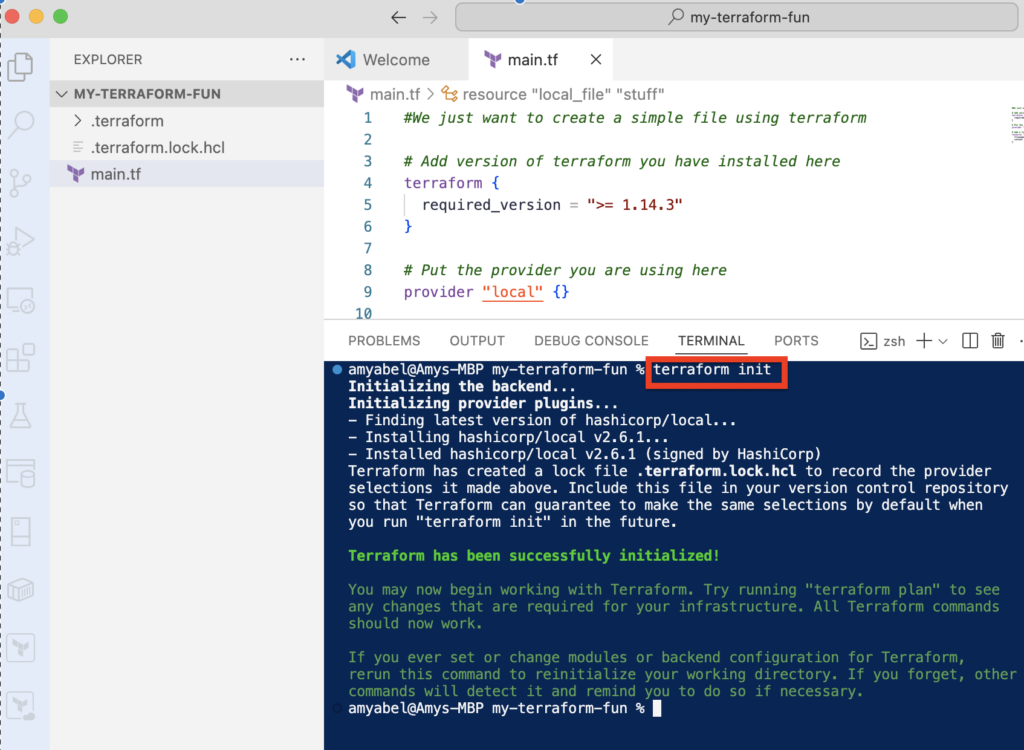
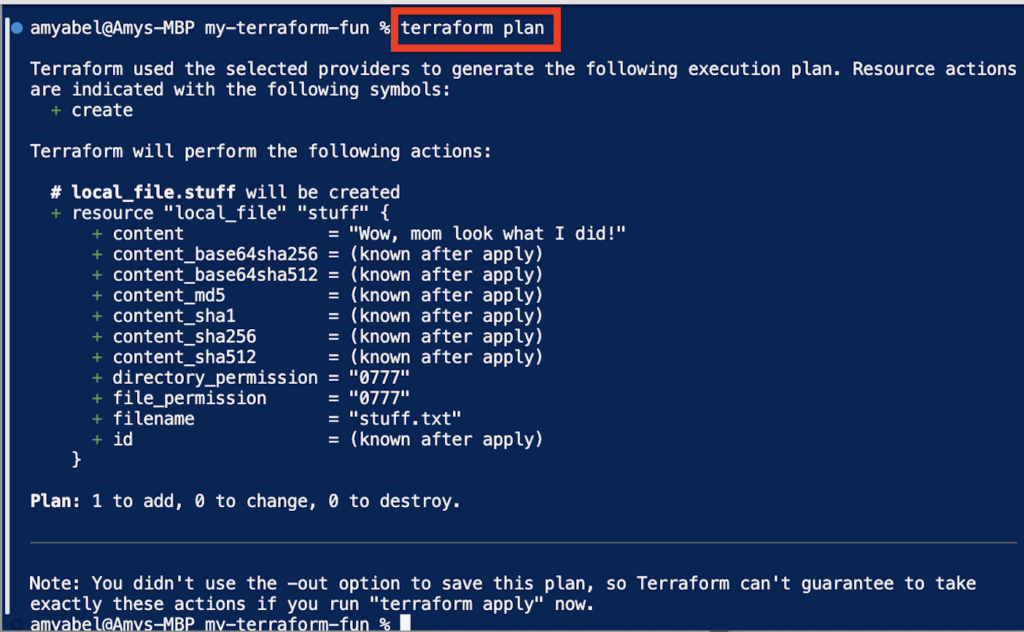
6. Validate and Plan Run a validation check and then a plan to see what Terraform intends to do.
terraform validate
terraform plan
Note: If terraform plan says “No changes,” it usually means you forgot to save your main.tf file. Hit Ctrl+S and try running the plan again.
7. If the plan looks good, apply it.
terraform applyType “YES” when prompted. You should see a success message indicating one change was made.
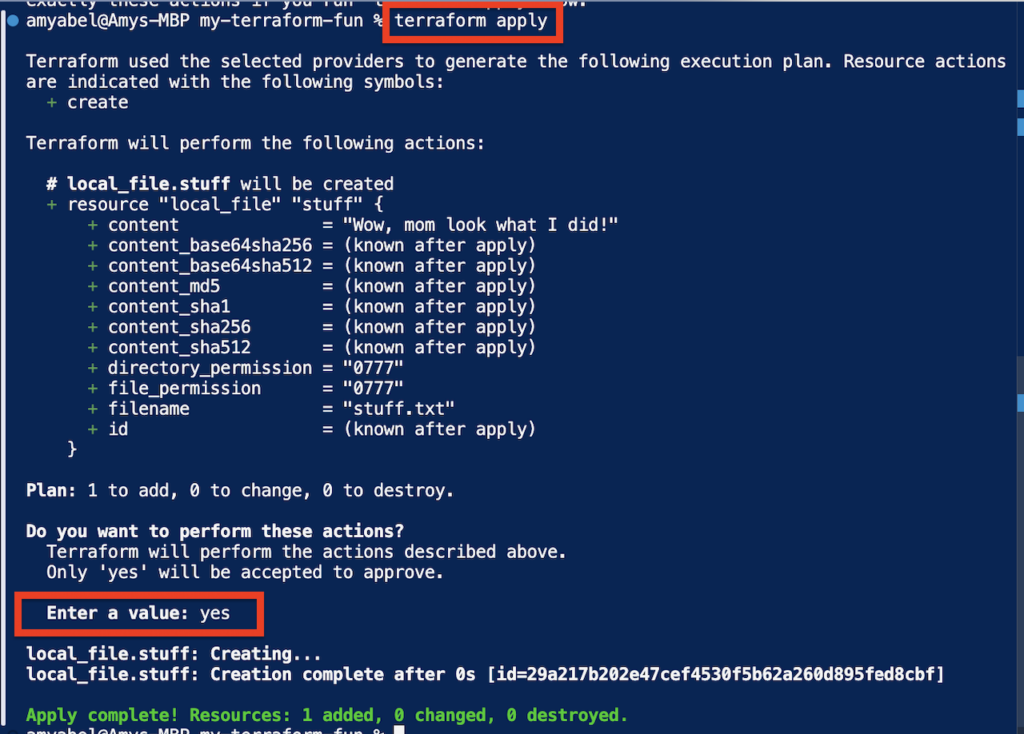
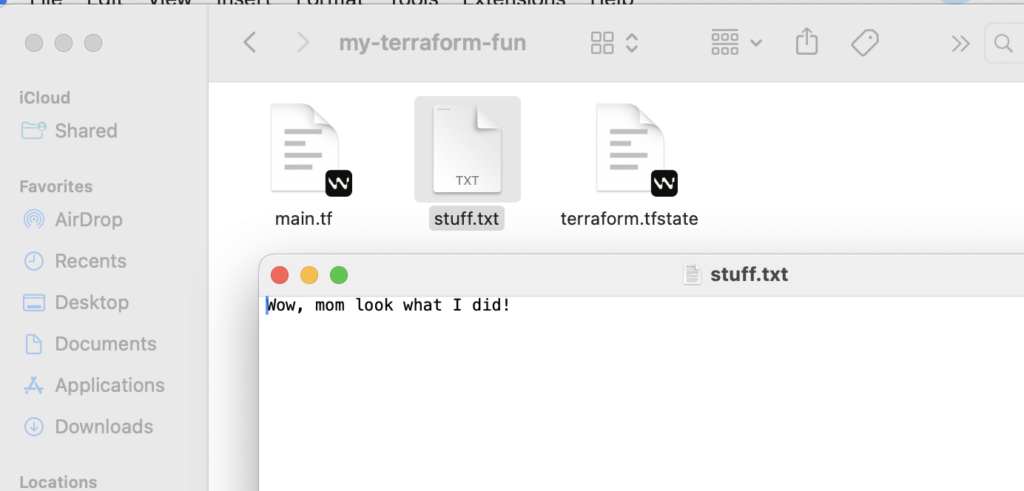
8. Check your file explorer, and you will see stuff.txt has been created.
9. Since this was just a test, let’s tear it down.
terraform destroy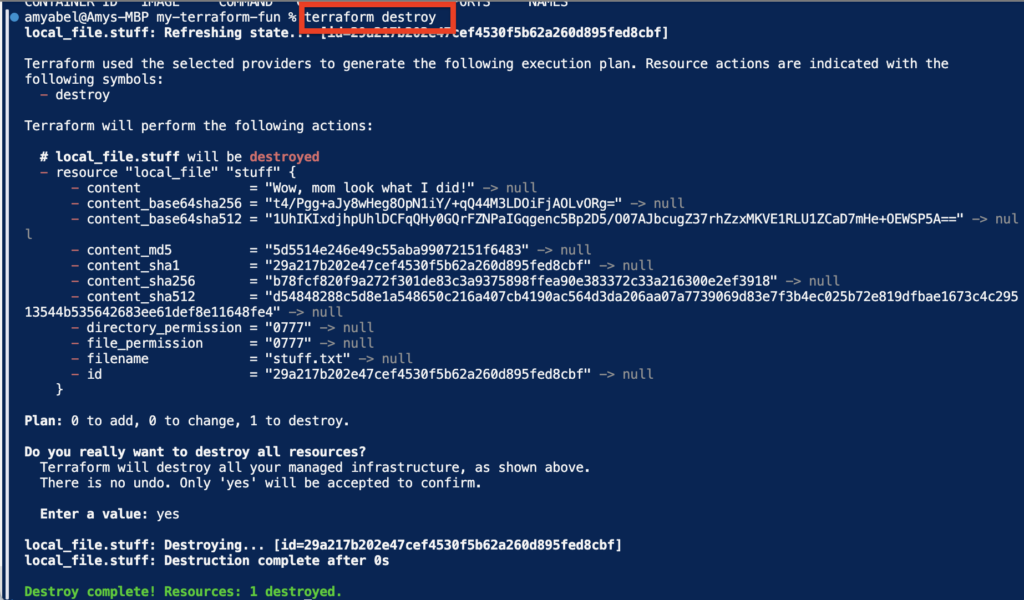
Step 6 Docker Integration
We will use Terraform to spin up a small virtual machine (container) using Docker.
- First, ensure you have Docker installed.
brew install --cask dockerNote: You may need to open the Docker Desktop application manually once to finish the installation and ensure the daemon is running.
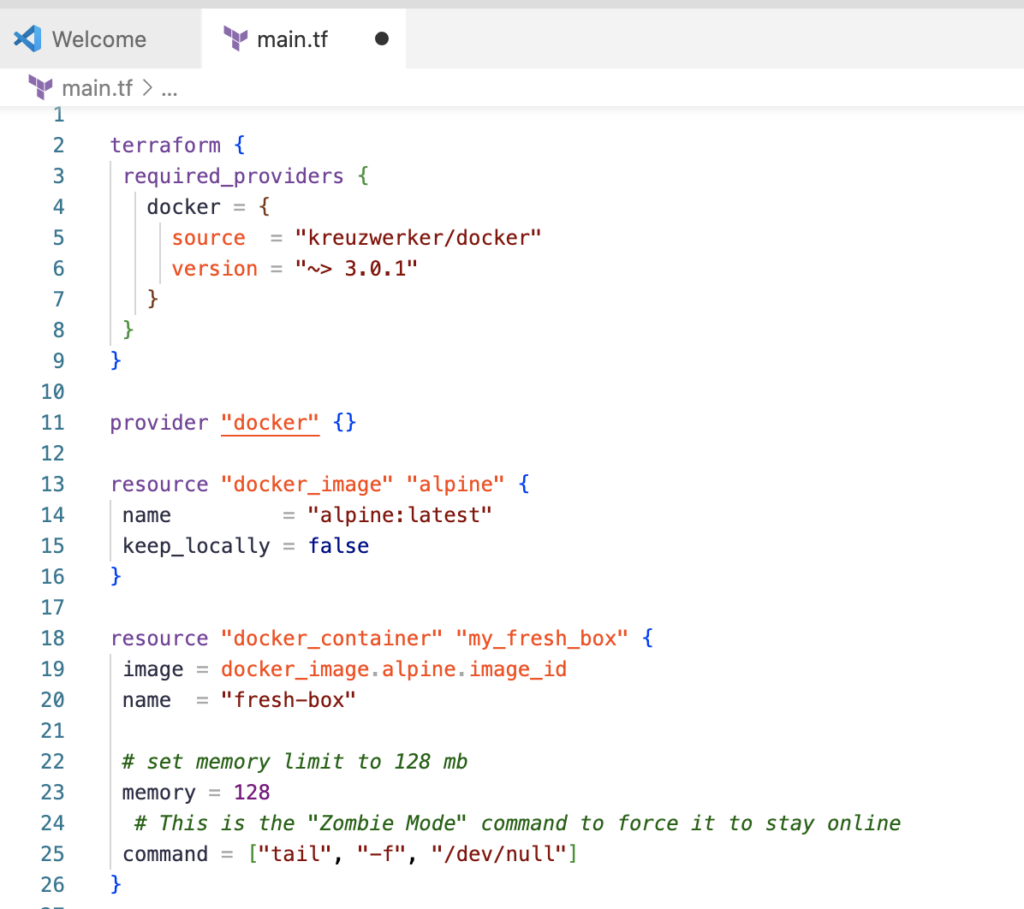
2. Update your main.tf file with the following code. We are replacing the local file configuration with the Docker provider.
terraform {
required_providers {
    docker = {
      source  = "kreuzwerker/docker"
      version = "~> 3.0.1"
    }
  }
}
provider "docker" {}
resource "docker_image" "alpine" {
  name         = "alpine:latest"
  keep_locally = false
}
resource "docker_container" "my_fresh_box" {
  image = docker_image.alpine.image_id
  name  = "fresh-box"
  # set memory limit to 128 mb
  memory = 128
  # This is the "Zombie Mode" command to force it to stay online
  command = ["tail", "-f", "/dev/null"]
}
3. Save the file and initialize with Ctrl+S.
4. Run commands one at a time.
terraform init
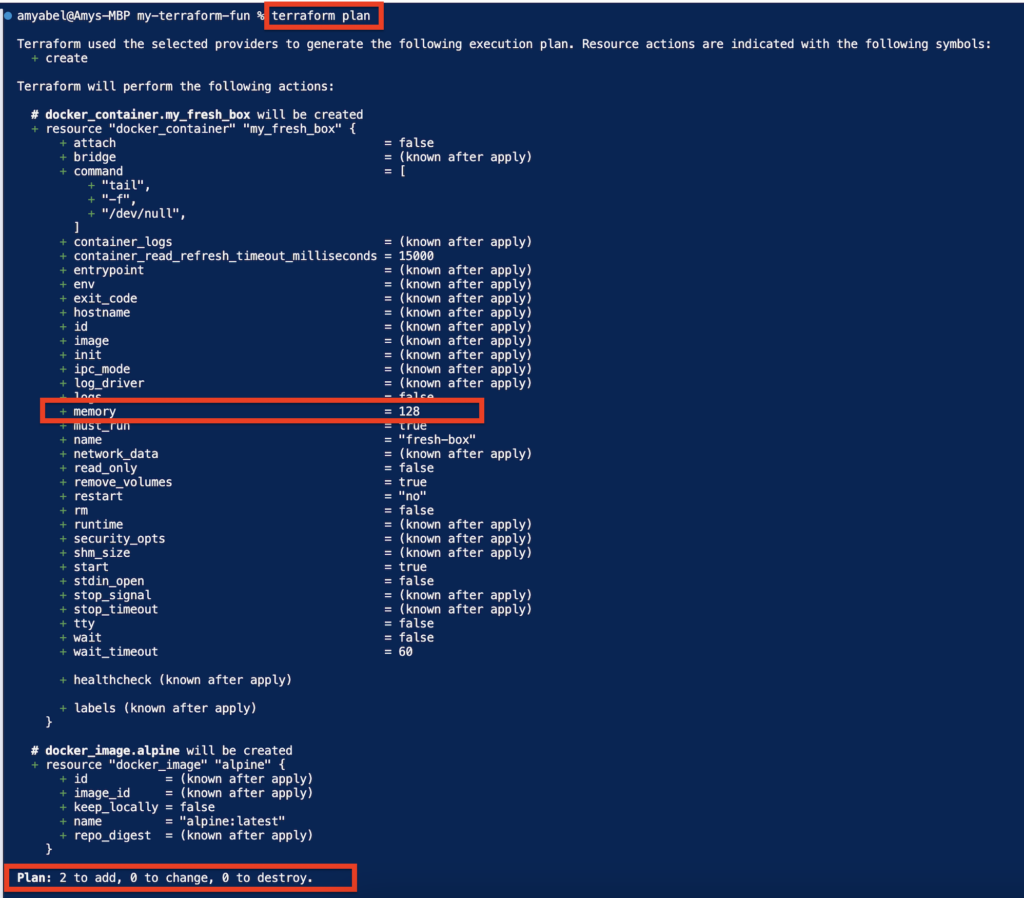
terraform plan
terraform apply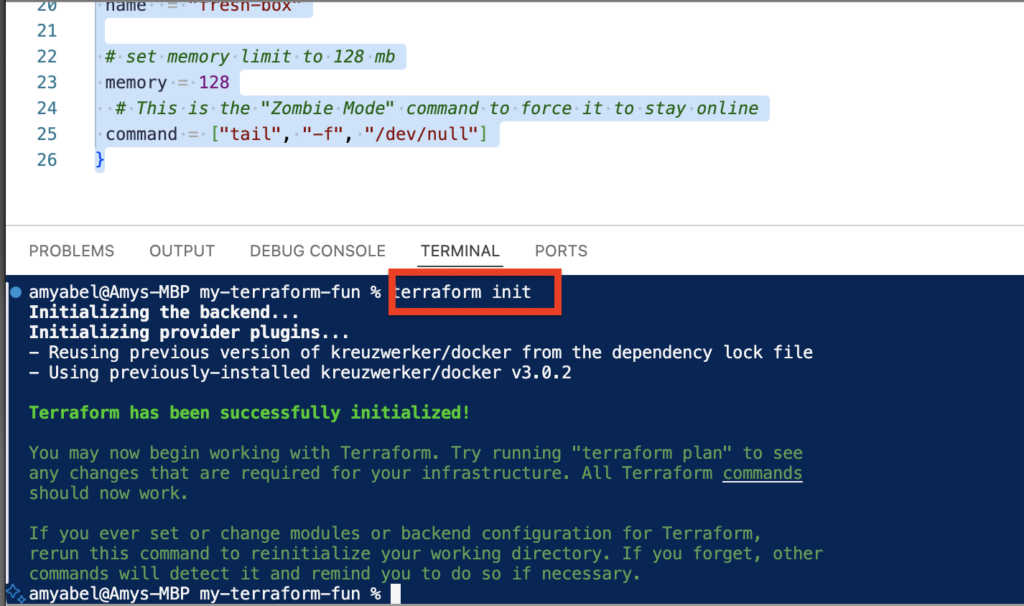
When you run the plan you will see all the objects being created but I want to point out the memory since I plan to change that on the next run.
5. Type YES when you apply the change
6. Check that your container is running by using Docker PS
docker psYou should see a container named fresh-box.

7. Login to the Vm with this command
docker exec -it fresh-box /bin/sh
8. Inside the container, run this command to check the memory limit in MB
cat /sys/fs/cgroup/memory.max | awk '{ print $1 / 1024 / 1024 " MB" }'
9. You should see 128 MB. Type exit to leave the container.
exit 
Step 7 Making Infrastructure Changes
We are going to change memory limit to see how Terraform handles updates.
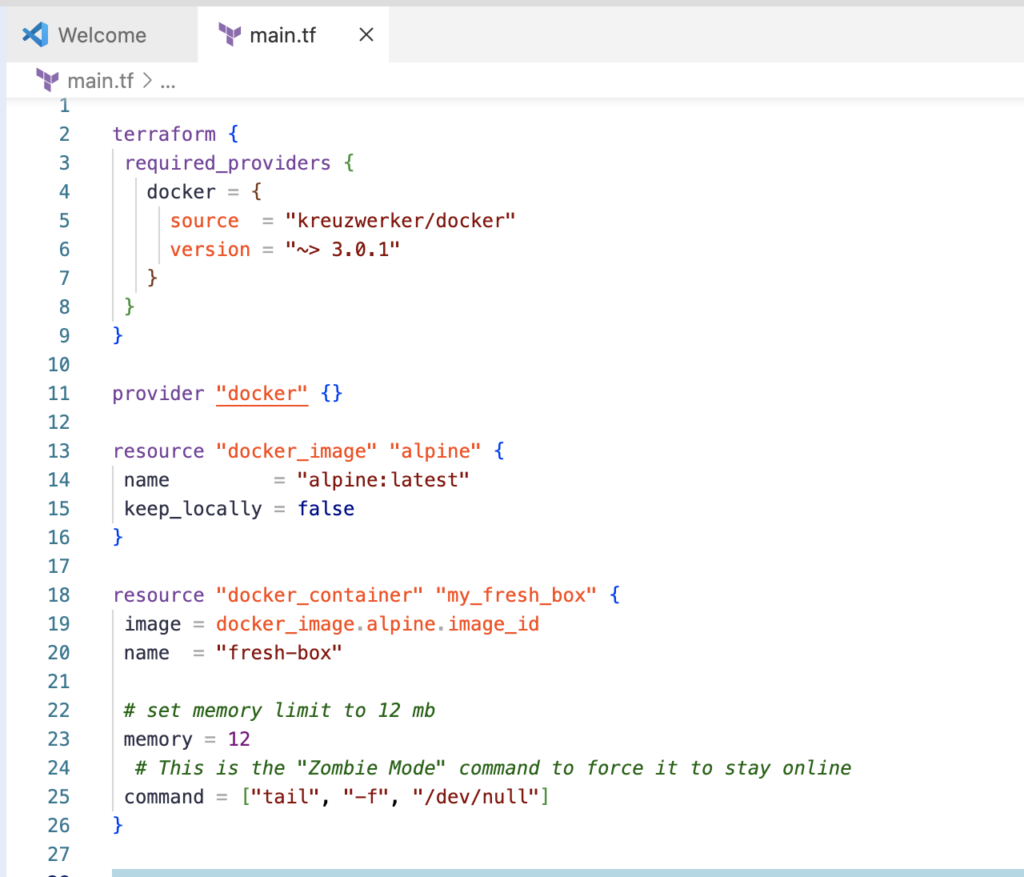
- Modify your main.tf file and change the memory value from 128 to 12.
terraform {
  required_providers {
    docker = {
      source  = "kreuzwerker/docker"
      version = "~> 3.0.1"
    }
  }
}
provider "docker" {}
resource "docker_image" "alpine" {
  name         = "alpine:latest"
  keep_locally = false
}
resource "docker_container" "my_fresh_box" {
  image = docker_image.alpine.image_id
  name  = "fresh-box"

  # CHANGING set memory limit to 128 mb
  memory = 12

  # This is the "Zombie Mode" command to force it to stay online
  command = ["tail", "-f", "/dev/null"]
}
2. Save the file with Ctrl+ S
3. Run the initialize command again
terraform init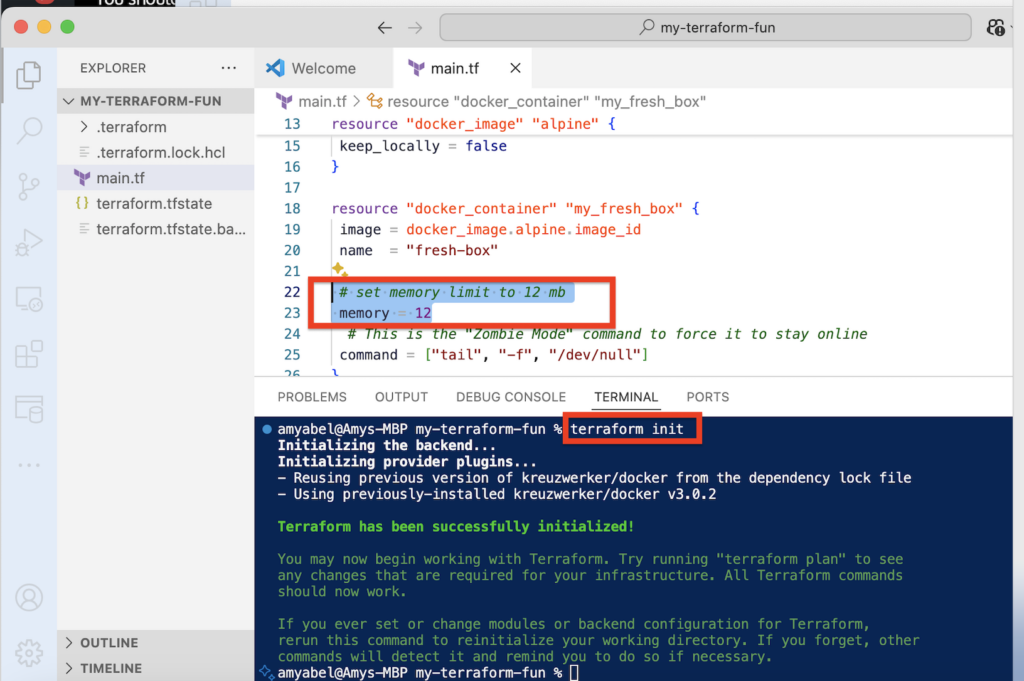
4. Check the plan
terraform plan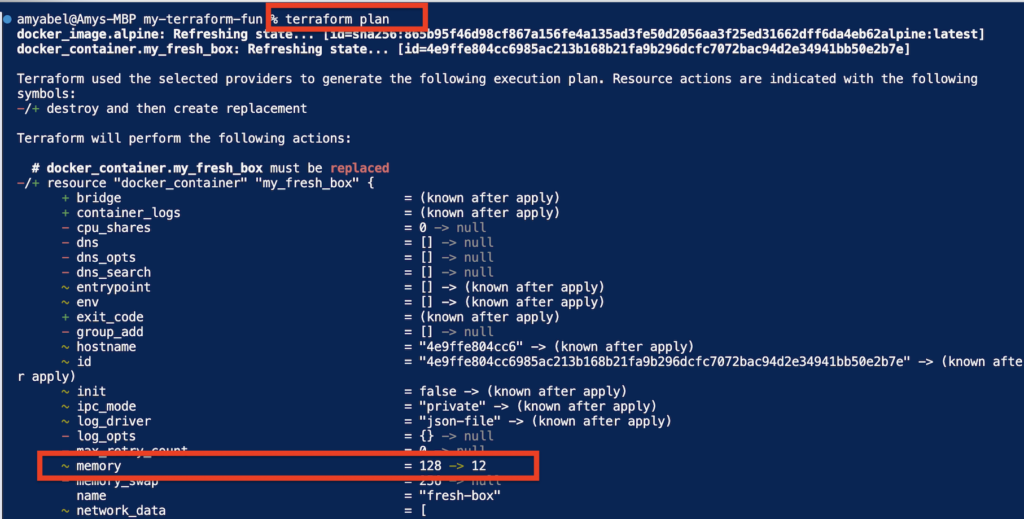
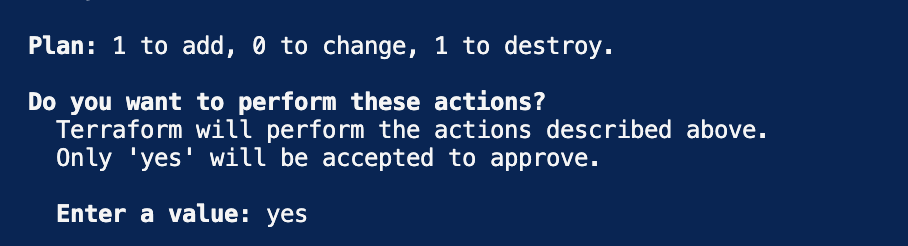
5. Apply the change
terraform apply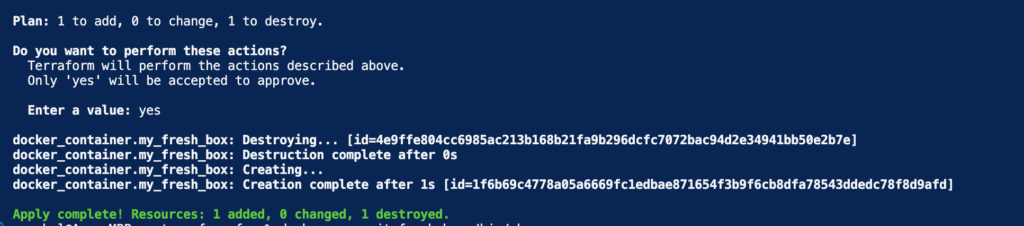
6. Log back into the container.
docker exec -it fresh-box /bin/sh7. Confirm the memory is what you changed it to.
cat /sys/fs/cgroup/memory.max | awk '{ print $1 / 1024 / 1024 " MB" }'You should now see the lower memory limit.

NOW YOU CAN GET CREATIVE AND PLAY WITH TERRAFORM ON YOUR OWN!
When you are done playing around, you can destroy the resources to keep your machine clean.
exit
terraform destroy
Leave a Reply